Advice and answers from the Pygma Team

How to create your Digital Twin
Having trouble creating your Digital Twin? Check this article!
A Digital Twin is an AI avatar based on your photos. You can use your Digital Twin to generate photos featuring yourself in various scenarios. To train your Digital Twin, you need to upload your photos to Pygma.
To do it, perform these steps:
1. Got to your Profile page (direct link: https://app.pygma.me/profile) and click your empty profile picture icon

2. Enter a name for your Digital Twin and click the send button

3. Choose a gender for your Digital Twin

4. Click Choose photos and upload 1-10 photos of your face.
Important!
Make sure your face is clearly visible and there are no other people in the frame. Avoid objects next to or obscuring your face.

5. Review the photos you've uploaded and click Generate digital twin when you're happy with your photos.

6. Now wait for a minute or two while your Digital Twin is being created

7. Your Digital Twin is ready! Click Save to save your result.

Now you can generate photos of yourself in any setting without having to do a real-life photo shoot!
Check this article if you want to learn how to generate photos
or check this article if you want to update your Digital Twin with new photos or change its gender
How to use Photo packs
Ever wanted to see yourself in your favorite movie or make a fun Christmas photo to send to your relatives? You can do it with a few clicks!
Scroll down while on your dashboard to generate content with yourself in some preset scenarios - from LinkedIn headshots to romantic photos perfect for Tinder.

Tap one of them to get 8 photos of you (or anyone else!). Then, you will be asked if you want to generate photos with your face in them or anyone else. Choose "My Digital twin" if you want the photos for yourself, or choose "Another person" to surprise your friends and family.

The generation will start immediately! You can find your photos on your Profile page. Feel free to leave the generation page - it can take a bit of time to generate.

Happy creating!
How to use AI recommendations
When you generate a picture or a video, you may notice AI suggestions. Here's how to utilize them to their full potential
When you create a post or a video, you can see AI recommendation bubbles next to your prompt field.

After clicking one of them, a relevant prompt appears in your prompt field. Then, you can just click Generate to get content ready to be posted!

AI recommendations are based on the information you gave Pygma about yourself. So for them to work as intended, make sure to fill in all your profile info.
You can do it either by clicking the Gear icon next to AI recommendations or by clicking Edit profile in your settings.


Make sure that your Category and Tags fields are filled. You can enter all the relevant topics you want into the Tags field - it all will be taken into account by our AI recommendations.

If you don't see your recommendations change after editing your profile, don't worry! It may take around 5 minutes. Each recommendation is made for your unique case, which takes some time.
Caution: changing your Tags will also change your News recommendations, making them more relevant to your topics of interest.
Happy creating!
How to make videos (reels)
You can create faceless videos with Pygma. Here's how to do it
1. Click a big green button with a "+" sign on the bottom of your screen if you're on mobile:

or "New content" in the upper right corner if you're on a desktop:

If you're using a tablet, the button position will depend on your resolution.
Alternatively, click "Create new reel" from your Dashboard:

2. If you've used the green button, choose "Reel":

3. Then, just tell Pygma what you want your video to be about or just click an AI recommendation.

Don't forget to tap "Subtitles" if you want Pygma to automatically generate them for your video.
4. Wait for a few minutes. You can leave the screen and return here later.
5. Your video is ready! Click "Next" to generate a caption

6. You can leave the caption that was generated automatically, regenerate it, or type in something else.
If you type something and then click "generate", Pygma will make a caption based on what you've typed, treating it as a prompt.
When you're satisfied with your caption, click "Next"

7. Your video is ready! Now, you can post it directly to Instagram, download it to use anywhere else, copy a caption, or close the window to save it for later.

You can always find all your videos in the Video tab in your profile.

Good luck and happy creating!
How to update your Digital twin (avatar) with new photos
You can replace your Digital twin with another one at any moment by uploading new photos. Here's how to do it
To update your Digital twin, you will need to upload new photos to reteach your model. It will delete your current Digital twin and replace it with a new one. Your old content will remain in your dashboard, but the new content you'll create will feature the new Digital twin instead of the old one.
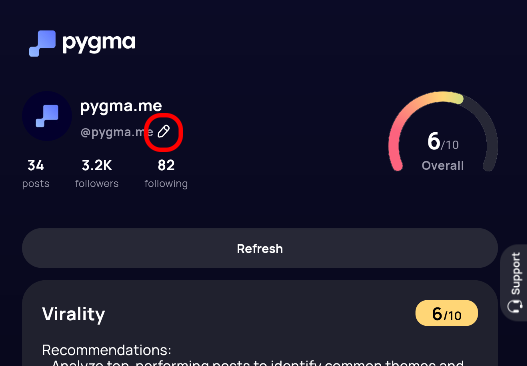
First, you need to click on the Settings icon. It's the gear icon to the right of your profile picture.

Then, click on the Edit icon next to your current avatar picture. It's a round green icon with a pencil.

If you want your new Twin to be a different gender, don't forget to choose the new gender first and then click "next"
Then, click "Change avatar"

Now, upload your new photos, click "Next" and wait

Done! Click "Finalize" and all photos with your Digital twin will now feature your new persona ✨

How to edit photos with AI
With Pygma, you can change anything you want on a photo with a simple prompt or use AI filters. Here's how to do it
1. To upload a photo you want to edit, click a big green button with a "+" sign on the bottom of your screen if you're on mobile:
%20.png)
or "New content" in the upper right corner if you're on a desktop:
-2.png)
If you're using a tablet, the button position will depend on your resolution.
-3.png)
3. If you want to edit your photo, choose "Edit my pictures". If you want to generate a photo from scratch, select "Generate images". This article is about editing your photos, so we will choose the second option:
-4.png)
If you want to know more about generating your pictures, check this article.
4. Click on a green "+" button and upload your image
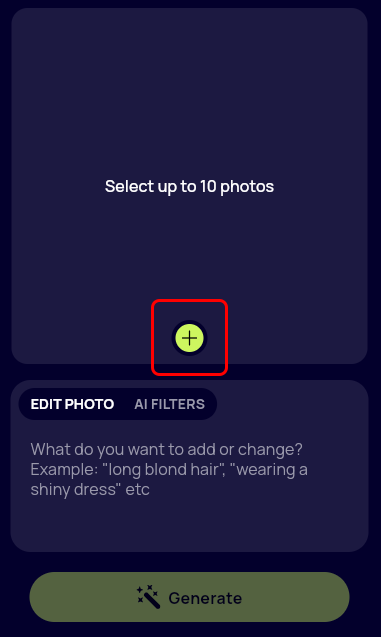
Now you can edit your photo with prompts or AI filters.
Let's see how we can edit with prompts first.
Enter what you want to change on a photo into the text box and click "Generate"
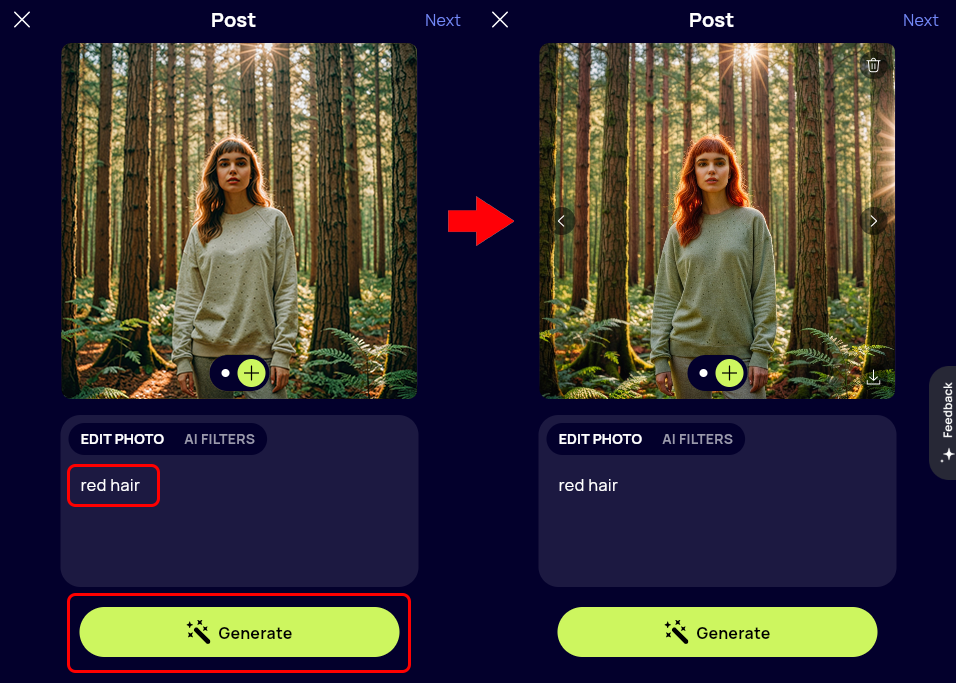
If you're satisfied with the result, click "Next" in the upper right corner. If not, you can enter more prompts or edit with AI filters.
Here's how to edit your photo with AI filters.
Go to the AI filters tab

Then select a filter you want to apply and click "Generate"
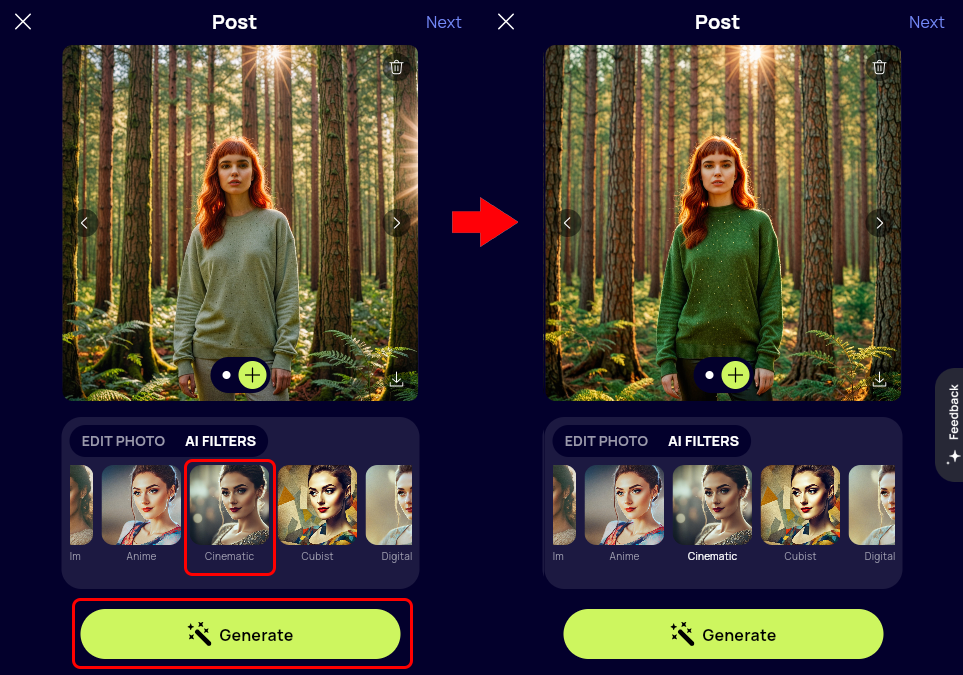
If you're satisfied with the result, click "Next" in the upper right corner. If not, you can enter more prompts or edit with AI filters. You can also download your result.
Now let's finish the post
Click "Next" in the upper right corner. Now you can add a caption to your Instagram post.
If you click "generate" while leaving it blank, Pygma will look at your picture and write an appropriate caption.
If you type something and then click "generate", Pygma will make a caption based on what you've typed.
You can also just type what you want to be in the caption yourself, edit the generation result, or just leave it blank.
%20-9.png)
When you're satisfied with your caption, click "Next" in the upper right corner.
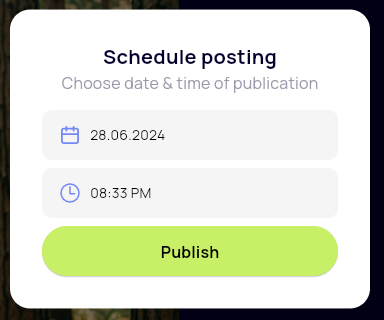
Now you can check what your post looks like. You can save it to your Pygma dashboard or schedule and publish it directly to Instagram if you've linked your Instagram to Pygma.
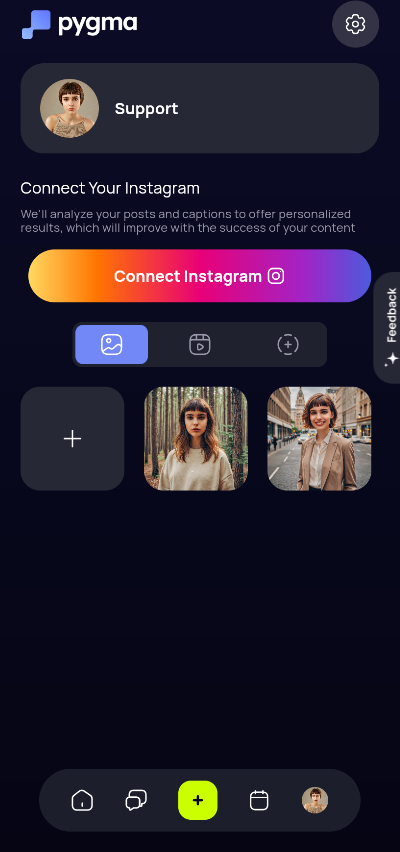
Here's how to connect your Instagram to Pygma for easy publishing
%2010.png)
If you schedule your post, you can choose the time and date it should be posted. You can also post it immediately.
%20-11.png)
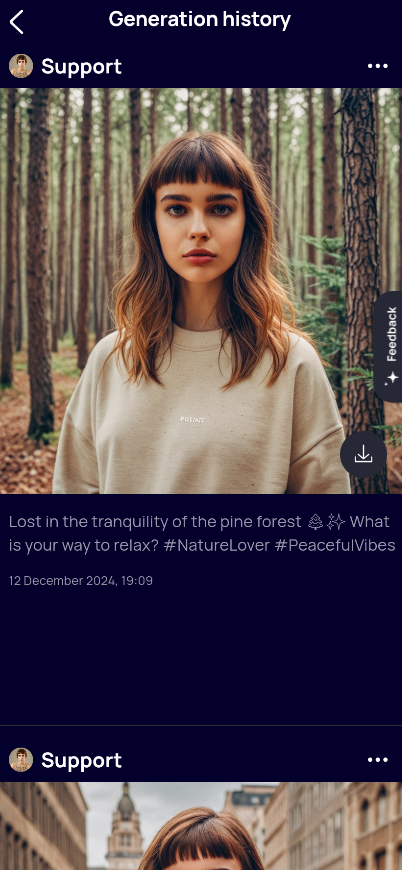
If you just save your post, you can always find it in your dashboard, where you can schedule its posting or download its content to post it manually
%2012.png)
%2013.png)
Now you know how to edit your photos without fancy tools with a few clicks! Good luck and happy creating.
How to create pictures (posts)
You can create posts with static pictures with or without your face with Pygma. Here's how to do it
1. Click a big green button with a "+" sign on the bottom of your screen if you're on mobile:
or "New content" in the upper right corner if you're on a desktop:

If you're using a tablet, the button position will depend on your resolution.
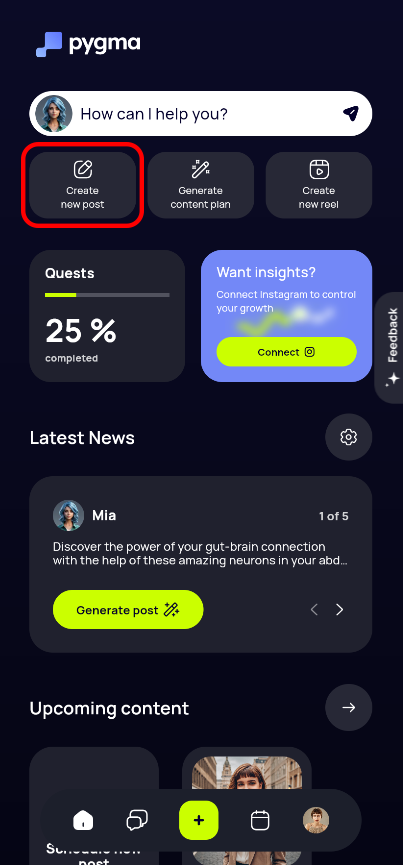
Alternatively, click "Create new post" from your Dashboard:
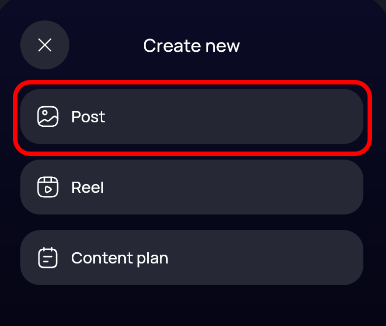
2. If you've used the green button, choose "Post":
3. If you want to generate a photo from scratch, choose "Generate images". If you want to edit your own photo, select "Edit my pictures". This article is about generating your photos from scratch, so we will choose the first option:
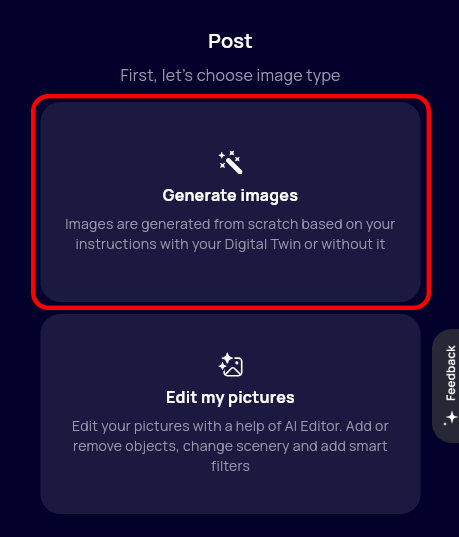
If you want to know more about editing your pictures with AI, check this article.
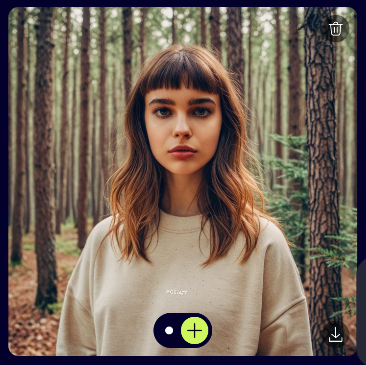
4. If you want your Digital twin to be on the photo, toggle "on". If not, toggle "off". When toggled "off", Pygma will generate pictures without people or pictures with random people.
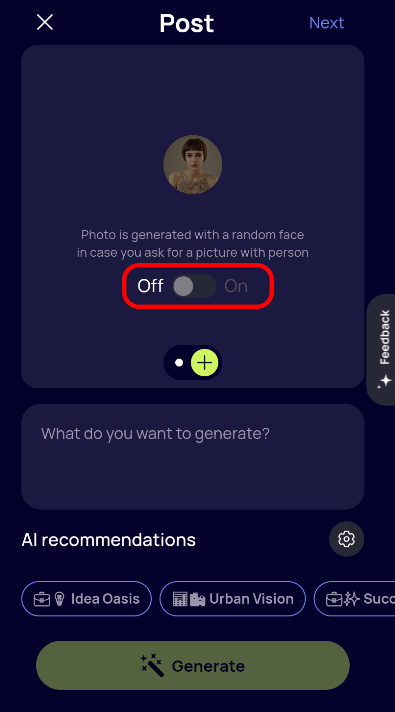
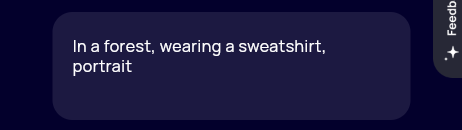
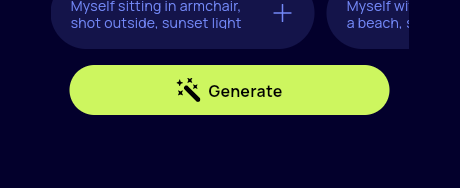
5. Type what you want to generate into the text box or choose an AI recommendation. Don't worry about prompt engineering - we handle this for you on our backend. But the best practice is to avoid words like "Generate me", "Please" etc. - just describe what you want to see on the picture
6. Then click "Generate"
7. You've generated a picture! Now you can edit it, delete it, download it, add another one to your post, or proceed further with your post.
If you want to learn more about how to edit your photos with AI, check that article. In this article, we will proceed with our generation result by clicking "Next" in the upper right corner. 8. Now you can add a caption to your Instagram post. If you click "generate" while leaving it blank, Pygma will look at your picture and write an appropriate caption.If you type something and then click "generate", Pygma will make a caption based on what you've typed.You can also just type what you want to be in the caption yourself, edit the generation result, or just leave it blank.
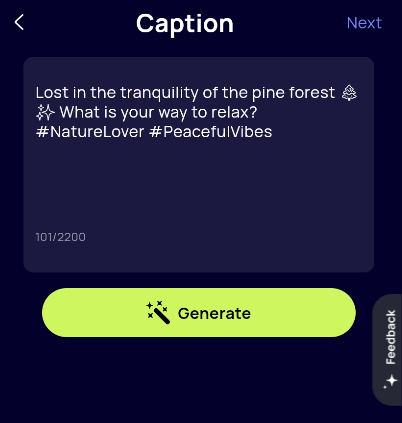
When you're satisfied with your caption, click "Next" in the upper right corner. 9. Now you can check what your post looks like. You can save it to your Pygma dashboard or schedule and publish it directly to Instagram if you've linked your Instagram to Pygma.
Here's how to connect your Instagram to Pygma for easy publishing
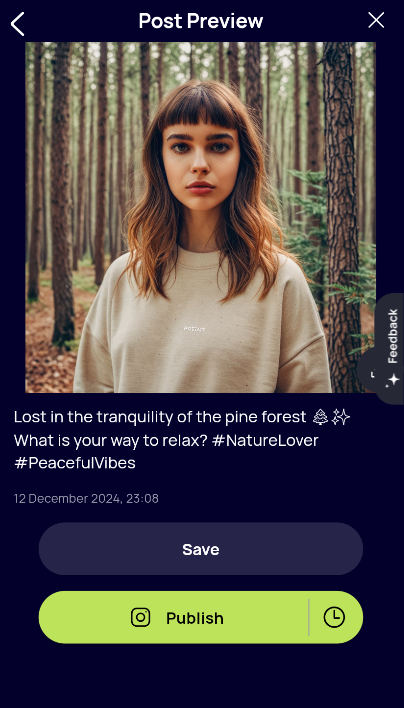
If you schedule your post, you can choose the time and date it should be posted. You can also post it immediately.
If you just save your post, you can always find it in your profile, where you can schedule its posting or download its content to post it manually
Now you know how to create realistic photos for your social media instantly! Good luck and happy creating.

How to get an Instagram Audit
Get an actionable plan for Instagram success! Read this article to learn how.
On your home screen, click the "Audit" tab

In the text field, paste your Instagram handle (e.g., @yourusername). This is the part of your profile URL after the last "/".
For example, if your profile link is https://www.instagram.com/pygma.me/, your handle is @pygma.me.
Then, click the green button on the right.

Please allow a few minutes for us to analyze your Instagram account.

Now, review your Audit results!
Your Audit results will be divided into four categories:
- Virality: Learn how to increase your reach.
- Profile: Check the effectiveness of your profile setup.
- Engagement: Discover ways to get more likes and comments.
- Posting: Analyze your content history for optimization.
Each category provides a score, actionable advice, and a detailed breakdown. For example, for the Profile section you will get a detailed breakdown of your Profile Highlights, Bio Content, and Account name.

After reading your results, you can click the "Get your action plan" button to chat with your personal AI assistant. Ask any Instagram questions you have!

You can analyze another Instagram account by entering a new handle.
Note: This will overwrite your previous results.

Instagram connection troubleshooting
That's how to troubleshoot the Instagram connection and check if your IG is linked to a Facebook page and switched to Business or Creator.
To access features like seamless posting and scheduling directly to Instagram, you need to connect your Instagram to Pygma.
When doing it, you will be asked to confirm the following:
- Your Instagram is linked to a Facebook page
- Your Instagram is switched to Business or Creator
Here’s what each of these requirements means and how to make sure your Instagram page meets these criteria.
How to check if your Instagram is linked to a Facebook page
You can connect Instagram to Facebook Page within your Page settings or Meta Business Suite.
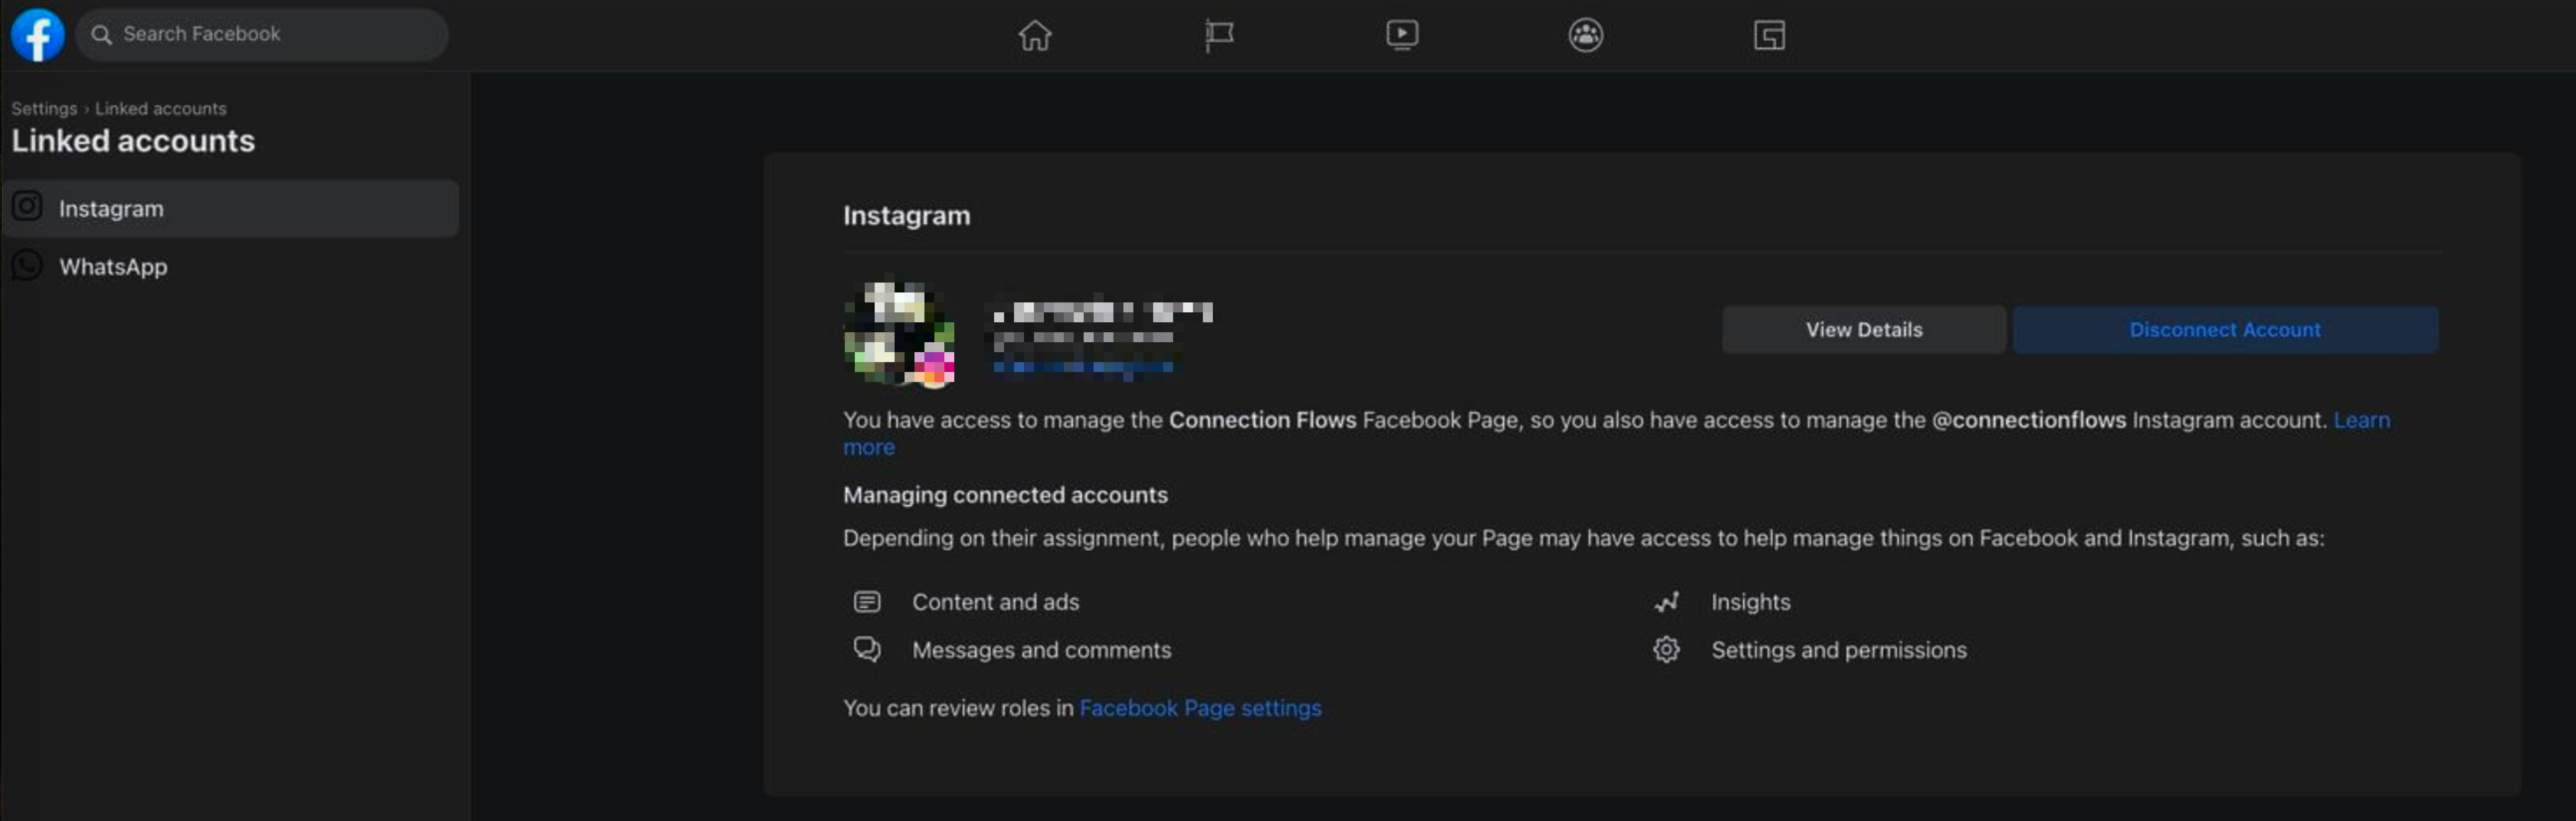
Connect Instagram account on your Page:
- Head to the Page that you want to connect to your Instagram account.
- From the Page, click Manage.
- From the left menu under Professional dashboard, click Linked accounts.
- To connect an account, click Connect account. Enter your Instagram account's Username and Password, and select Log in. When the account is connected properly, you should see “View Details” and “Disconnect Account”:
How to link your Instagram to a Facebook page
Connect Instagram account within Meta Business Suite (desktop):
- In Meta Business Suite desktop, click Settings from the sidebar on the left.
- Click Business assets.
- Click Add assets and select Instagram account.
- Review and agree to our terms for connecting your Instagram account, then click Claim Instagram account.
- A new window will open. Enter your Instagram username and password, and click Log In. If you’re already logged in to Instagram, you can also click Continue as [Instagram name] if that's the account you want to connect to. Otherwise, tap Switch accounts to log into another account.
- If your Two-Factor Authentication is turned on, we’ll ask you to enter in your security code.
- Click Confirm.
Connect Instagram account within Meta Business Suite (mobile app):
- Tap these 9 dots in the Meta Business Suite mobile app:
.png)
- Tap Settings.
- Next to Instagram, tap Connect.
- Tap Connect account.
- Confirm whether you want to allow access to Instagram messages in Inbox. Click the toggle to change your settings.
- Tap Continue. You can change this setting at any time in Settings.
- Log into the Instagram account you want to connect. Note: If you're logged into Instagram, tap Continue as…, or tap Switch accounts to log into another account.
- You'll be prompted to provide your login information once more for security purposes.
- Tap Log in.
- Tap Save info if you want to save your login information on the browser you’re using or Not now to skip this step.
- Tap OK.
How to check if your Instagram is switched to Business or Creator
If you’re connecting Instagram, first thing to do is to make sure your page is set up as a professional account (e.g. a business or creator account). These steps will help you figure this out and convert your account if needed:
- Open the Instagram app on your mobile device and go to your profile.
- Tap on the hamburger menu (three horizontal lines) in the upper right corner of the app.
- Open Settings.
- From there, tap Account.
- You will see different menus depending on your account type:
- If you currently have an Instagram personal profile, you'll see one option:
Switch to professional account
- If you currently have an Instagram business account, you'll see these two options:
Switch to personal account Switch to creator account
- If you currently have an Instagram creator account, you'll see these two options:
Switch to personal account Switch to business account
How to switch Instagram to Business or Creator
If you found that your account is a personal account, please follow the steps below to convert it to a professional account:
- Open the Instagram app on your mobile device and tap the menu button in the upper right corner.
- Head to Settings and Privacy.
- Scroll down to For professionals and tap Account type and tools.
- Tap Switch to professional account.
NOTE: If you don't see Switch to professional account, but do see Business tools and controls, it means your Instagram is already switched to a professional account and you're all set.
5. Tap Continue until you reach the category page. Select a category.
6. Select creator or business. Your Instagram account will be converted immediately.
Alternatively, if your Instagram is linked to a Facebook page, you can switch your Instagram from personal to Business or Creator from your Facebook page. Here’s how to do it:
- Head over to Facebook and navigate to the list of Pages you have access to (or click this link).
- Click on the Page that you'll link to your Instagram account, or create a new Page if you don't already have one.
NOTE: You must have admin access with Full Control on the Page you're associating to your Instagram professional account. To check if you have the proper permissions, follow the steps above: Checking your admin settings in Facebook
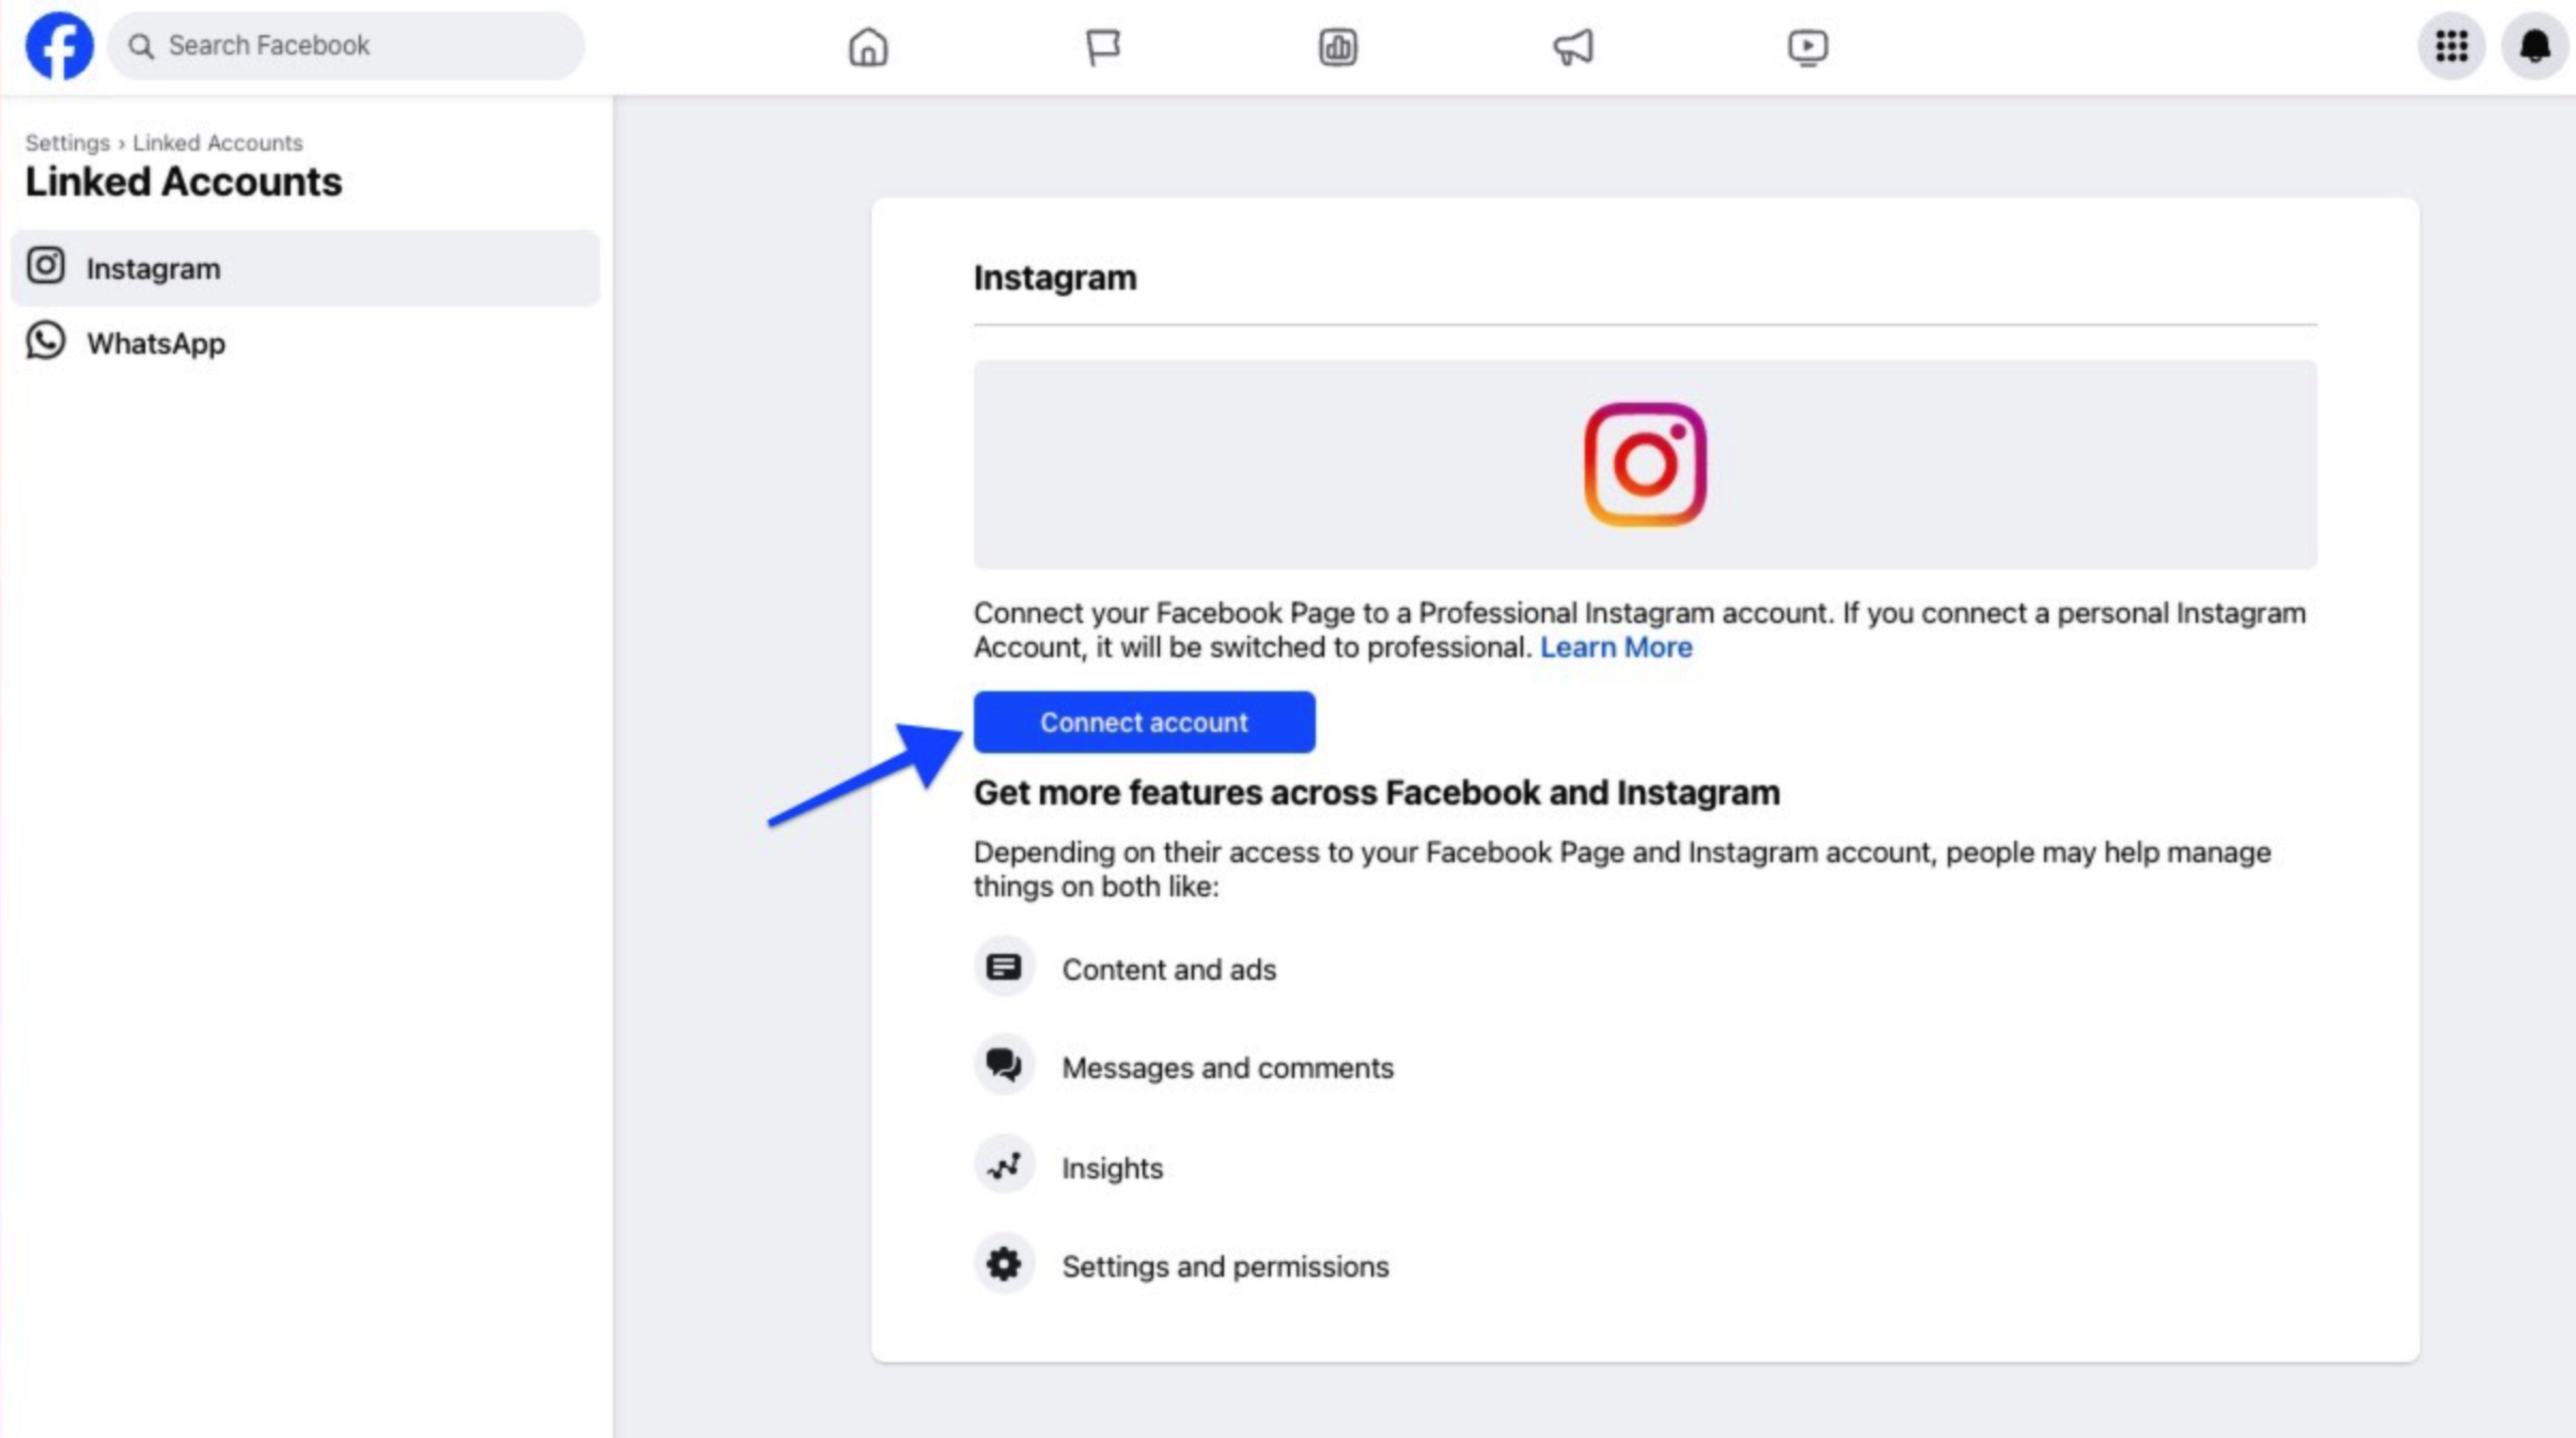
3. Once you're in your Page, click Settings in the left-hand sidebar.
4. Click Settings on the left menu side, then click Linked Accounts.
5. Click Connect Account.
6. Click Connect and then Confirm to proceed through the connection prompts.
7. Enter your Instagram login credentials and click Log In. If you're already signed into Instagram, or your login credentials are saved in your browser, you'll just need to click Continue.
8. You'll see a pop up window prompting you to set up your Instagram business or creator account. Follow the on-screen instructions, ensure to submit your contact information, and click Done.
NOTE: If you don't see the pop up window, you can try do the converting via the Instagram app instead. Following the steps in the next paragraph.
If this didn’t help
If both requirements are met but you still can’t connect your Instagram, you should check if you have full control over the Facebook page and your permissions.
How to check your admin settings in Facebook
You need to make sure your have full control over the Facebook page. You can do that in two places: in the Professional Dashboard or in the Meta Business Suit. The instructions below will give you a hint on which option you have.
Checking settings in the Professional Dashboard
- In Facebook, open your Page and make sure you’re logged in as your Facebook Page (not your profile).
- Click Professional Dashboard in the menu on the left.
- Click Page Access in the menu on the left.
- Next, click your name and a popup will appear. It should say, "This person has full control."
NOTE:
- If it doesn't say “This person has full control" next to your Facebook profile name, it means your permissions need to be adjusted. It can be done by someone who has full access. Or, perhaps you have another Facebook profile that is linked to the page.
- If the list doesn't show your Facebook profile name, you're probably using Meta Business Suite and you’ll need to check the settings there (see below).
Checking settings in Meta Business Suite
- Go your Meta Business Suite Settings.
- If you land on a page with multiple Business Suite accounts, first click on the account for the Facebook Page you’re trying to access.
NOTE: If you don’t see the Business Suite account that you’re looking for, you aren’t properly setup as an admin with Full Control within that Business Suite, and you’ll want to ask someone else on your team to lend a hand.
3. There are two places to check for permissions.
First, click Pages under the "Accounts" section and look for your name on the list. You’ll want to ensure the setting Full control: Everything is toggled on. 4. Next, navigate to Users section and click on People. Make sure that your name is added to the list, and that you have the setting Full control: Everything is toggled on.
How to check your permissions
The first and foremost thing to do is to make sure you have all the permissions between Facebook and Pygma. When you're connecting Instagram, you can view the list of permissions granted to Pygma (these all are required by Meta). It's important to grant all permissions for all Pages (even those that aren't connected to Pygma). If permissions are missing, it can prevent us from finding the channels you manage.
- Log into the Facebook personal profile that has admin access with Full Control on the Facebook Page.
- Click on the small drop-down arrow at the top right of your screen and then click Settings & privacy > Settings.
- Head to Business Integrations in Facebook.
NOTE: Please note that these settings are found on your Facebook profile and not within the Facebook Page settings, so you must be using Facebook as your profile to access them.
4. Find Pygma in the list and choose View and Edit.
5. Scroll down to the list of Pages and ensure that ALL boxes are selected (you may need to click See all pages to expand the list of pages and see the ones that need permissions to be granted). From here, tick all of the empty boxes.
NOTE: If you don’t see any individual Pages listed in the following screens, it means that you’ve previously granted Pygma permissions to access all Pages, which is the ideal setup.
6. After selecting all of your accounts, click Save.
How to connect Instagram
If you don't know how to connect your Instagram page to Pygma, check this article
1. Go to https://app.pygma.me/#/home and click the “Connect Instagram” button on top of your screen:

2. You will be asked if your Instagram is linked to this Facebook page and is switched to Business or Creator.
If you're not sure what does it mean, click here to find out!

If your Instagram fits those criteria, click the checkmarks and click "Connect"
3. You will be redirected to log into your Facebook. Please log into the Facebook account which is linked to your Instagram:

4. Select your Instagram account you want to link to Pygma and click "connect account" on the bottom of the page:


If your Instagram page isn't shown after you log into your Facebook, please check that your Instagram is linked to this Facebook page and is switched to Business or Creator. Click here to find out how!
5. Your Instagram is connected! Click "Got it" and enjoy your Instagram integration ✨


How to create a Pygma account
New to Pygma? Here's a step-by-step guide to creating your account.
First, go to https://app.pygma.me
You will be met with a dialogue window with Mia - just click "Hi, Mia!"

You have two options: enter your Instagram username for a detailed, actionable account audit, or skip this step for now (instructions below). We recommend the audit and will use it as our example.
What happens when you enter your username:

Type your Instagram handle into the field and click the green send button.

On the next screen, enter an email you have access to or use your Google account.
Important!
If you are using the internal Instagram browser (that happens, when you are redirected to Pygma from Instagram), signing up with your Google account will not work.
If this is the case, please open Pygma in your regular browser (the option to do so should be under the 3 dots (...) in your upper right corner.)

You will get 5 free tokens to try out the app! Click "Let' go!" to continue

Congratulations! Now you have your Pygma account and can see the results of your Audit.
Feel free to explore the app - here are more help articles to get you started:
How to create pictures (posts)
What happens when you don't enter your username:

Click the Skip button to skip entering your username.

Click Select category, then choose something that fits your niche and click Confirm selection

On the next screen, enter an email you have access to or use your Google account.
Important!
If you are using the internal Instagram browser (that happens, when you are redirected to Pygma from Instagram), signing up with your Google account will not work.
If this is the case, please open Pygma in your regular browser (the option to do so should be under the 3 dots (...) in your upper right corner.)
You will get 5 free tokens to try out the app! Click "Let's go!" to continue

Congratulations! Now you have your Pygma account and can start creating content or perform an Audit.
Feel free to explore the app - here are more help articles to get you started:
How to create pictures (posts)
How to manage and cancel your subscription
If you don't know how to manage Pygma account, check this article
To manage your subscription, first click on the Settings icon (it's the gear icon to the right from your profile picture)

Then, click "Subscription"

You will be redirected to your Stripe page. There, you can cancel your subscription, edit and update your payment methods and billing info, check when your next payment will be and see other information about your subscription.