Having trouble creating your Digital Twin? Check this article!
A Digital Twin is an AI avatar based on your photos. You can use your Digital Twin to generate photos featuring yourself in various scenarios. To train your Digital Twin, you need to upload your photos to Pygma.
To do it, perform these steps:
1. Got to your Profile page (direct link: https://app.pygma.me/profile) and click your empty profile picture icon

2. Enter a name for your Digital Twin and click the send button

3. Choose a gender for your Digital Twin

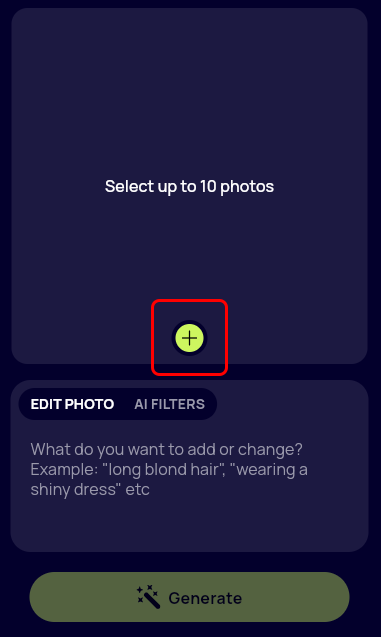
4. Click Choose photos and upload 1-10 photos of your face.
Important!
Make sure your face is clearly visible and there are no other people in the frame. Avoid objects next to or obscuring your face.

5. Review the photos you've uploaded and click Generate digital twin when you're happy with your photos.

6. Now wait for a minute or two while your Digital Twin is being created

7. Your Digital Twin is ready! Click Save to save your result.

Now you can generate photos of yourself in any setting without having to do a real-life photo shoot!
Check this article if you want to learn how to generate photos
or check this article if you want to update your Digital Twin with new photos or change its gender
Ever wanted to see yourself in your favorite movie or make a fun Christmas photo to send to your relatives? You can do it with a few clicks!
Scroll down while on your dashboard to generate content with yourself in some preset scenarios - from LinkedIn headshots to romantic photos perfect for Tinder.

Tap one of them to get 8 photos of you (or anyone else!). Then, you will be asked if you want to generate photos with your face in them or anyone else. Choose "My Digital twin" if you want the photos for yourself, or choose "Another person" to surprise your friends and family.

The generation will start immediately! You can find your photos on your Profile page. Feel free to leave the generation page - it can take a bit of time to generate.

Happy creating!
When you generate a picture or a video, you may notice AI suggestions. Here's how to utilize them to their full potential
When you create a post or a video, you can see AI recommendation bubbles next to your prompt field.

After clicking one of them, a relevant prompt appears in your prompt field. Then, you can just click Generate to get content ready to be posted!

AI recommendations are based on the information you gave Pygma about yourself. So for them to work as intended, make sure to fill in all your profile info.
You can do it either by clicking the Gear icon next to AI recommendations or by clicking Edit profile in your settings.


Make sure that your Category and Tags fields are filled. You can enter all the relevant topics you want into the Tags field - it all will be taken into account by our AI recommendations.

If you don't see your recommendations change after editing your profile, don't worry! It may take around 5 minutes. Each recommendation is made for your unique case, which takes some time.
Caution: changing your Tags will also change your News recommendations, making them more relevant to your topics of interest.
Happy creating!
You can create faceless videos with Pygma. Here's how to do it
1. Click a big green button with a "+" sign on the bottom of your screen if you're on mobile:

or "New content" in the upper right corner if you're on a desktop:

If you're using a tablet, the button position will depend on your resolution.
Alternatively, click "Create new reel" from your Dashboard:

2. If you've used the green button, choose "Reel":

3. Then, just tell Pygma what you want your video to be about or just click an AI recommendation.

Don't forget to tap "Subtitles" if you want Pygma to automatically generate them for your video.
4. Wait for a few minutes. You can leave the screen and return here later.
5. Your video is ready! Click "Next" to generate a caption

6. You can leave the caption that was generated automatically, regenerate it, or type in something else.
If you type something and then click "generate", Pygma will make a caption based on what you've typed, treating it as a prompt.
When you're satisfied with your caption, click "Next"

7. Your video is ready! Now, you can post it directly to Instagram, download it to use anywhere else, copy a caption, or close the window to save it for later.

You can always find all your videos in the Video tab in your profile.

Good luck and happy creating!
You can replace your Digital twin with another one at any moment by uploading new photos. Here's how to do it
To update your Digital twin, you will need to upload new photos to reteach your model. It will delete your current Digital twin and replace it with a new one. Your old content will remain in your dashboard, but the new content you'll create will feature the new Digital twin instead of the old one.
First, you need to click on the Settings icon. It's the gear icon to the right of your profile picture.

Then, click on the Edit icon next to your current avatar picture. It's a round green icon with a pencil.

If you want your new Twin to be a different gender, don't forget to choose the new gender first and then click "next"
Then, click "Change avatar"

Now, upload your new photos, click "Next" and wait

Done! Click "Finalize" and all photos with your Digital twin will now feature your new persona ✨

With Pygma, you can change anything you want on a photo with a simple prompt or use AI filters. Here's how to do it
1. To upload a photo you want to edit, click a big green button with a "+" sign on the bottom of your screen if you're on mobile:
%20.png)
or "New content" in the upper right corner if you're on a desktop:
-2.png)
If you're using a tablet, the button position will depend on your resolution.
-3.png)
3. If you want to edit your photo, choose "Edit my pictures". If you want to generate a photo from scratch, select "Generate images". This article is about editing your photos, so we will choose the second option:
-4.png)
If you want to know more about generating your pictures, check this article.
4. Click on a green "+" button and upload your image
Enter what you want to change on a photo into the text box and click "Generate"
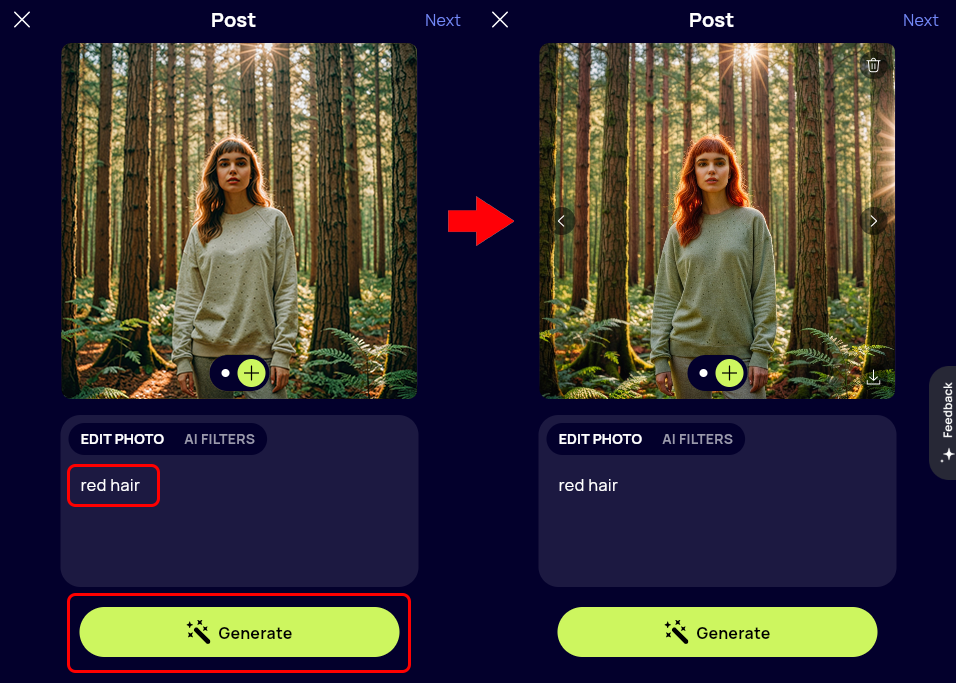
If you're satisfied with the result, click "Next" in the upper right corner. If not, you can enter more prompts or edit with AI filters.
Go to the AI filters tab

Then select a filter you want to apply and click "Generate"
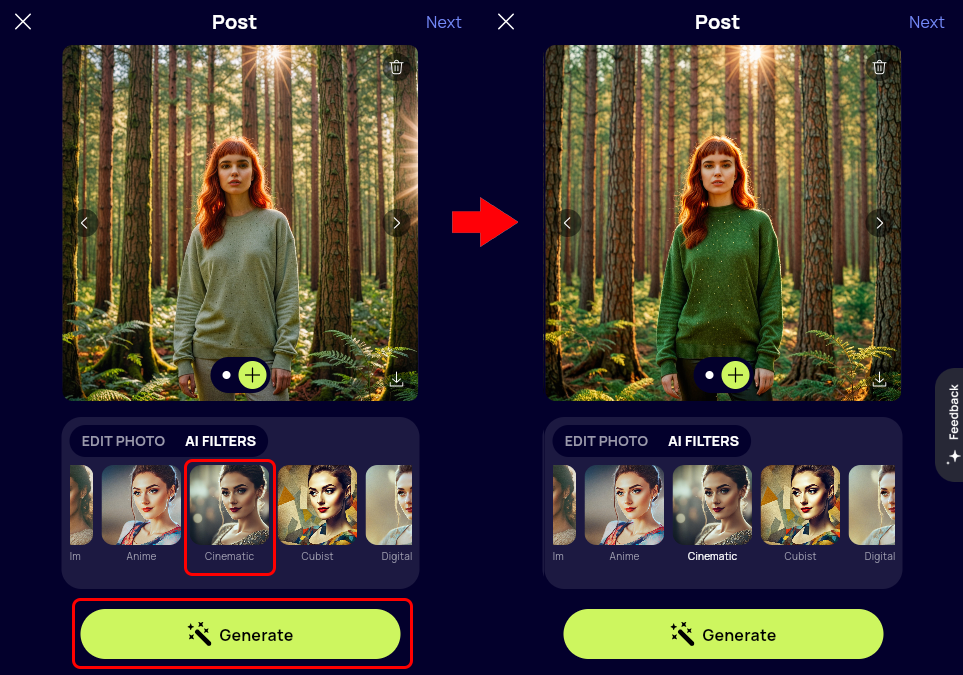
If you're satisfied with the result, click "Next" in the upper right corner. If not, you can enter more prompts or edit with AI filters. You can also download your result.
Click "Next" in the upper right corner. Now you can add a caption to your Instagram post.
If you click "generate" while leaving it blank, Pygma will look at your picture and write an appropriate caption.
If you type something and then click "generate", Pygma will make a caption based on what you've typed.
You can also just type what you want to be in the caption yourself, edit the generation result, or just leave it blank.
%20-9.png)
When you're satisfied with your caption, click "Next" in the upper right corner.
Now you can check what your post looks like. You can save it to your Pygma dashboard or schedule and publish it directly to Instagram if you've linked your Instagram to Pygma.
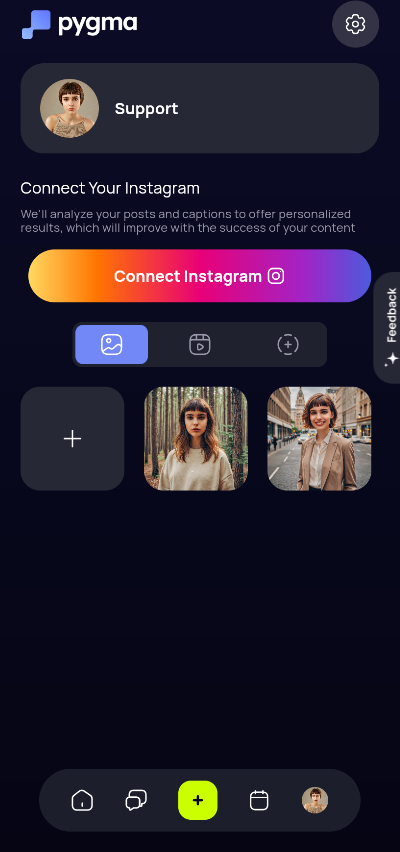
Here's how to connect your Instagram to Pygma for easy publishing
%2010.png)
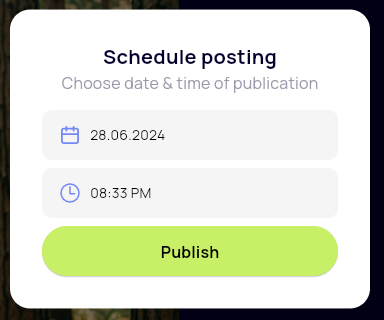
If you schedule your post, you can choose the time and date it should be posted. You can also post it immediately.
%20-11.png)
If you just save your post, you can always find it in your dashboard, where you can schedule its posting or download its content to post it manually
%2012.png)
%2013.png)
Now you know how to edit your photos without fancy tools with a few clicks! Good luck and happy creating.
You can create posts with static pictures with or without your face with Pygma. Here's how to do it
1. Click a big green button with a "+" sign on the bottom of your screen if you're on mobile:
or "New content" in the upper right corner if you're on a desktop:

If you're using a tablet, the button position will depend on your resolution.
Alternatively, click "Create new post" from your Dashboard:
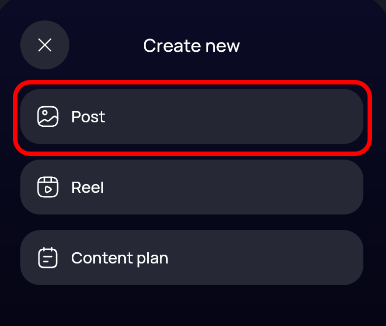
2. If you've used the green button, choose "Post":
3. If you want to generate a photo from scratch, choose "Generate images". If you want to edit your own photo, select "Edit my pictures". This article is about generating your photos from scratch, so we will choose the first option:
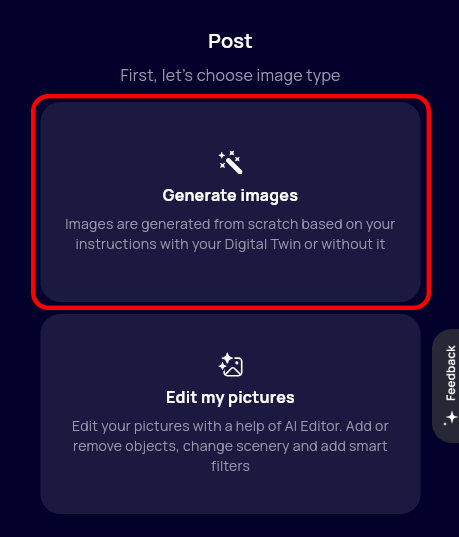
If you want to know more about editing your pictures with AI, check this article.
4. If you want your Digital twin to be on the photo, toggle "on". If not, toggle "off". When toggled "off", Pygma will generate pictures without people or pictures with random people.
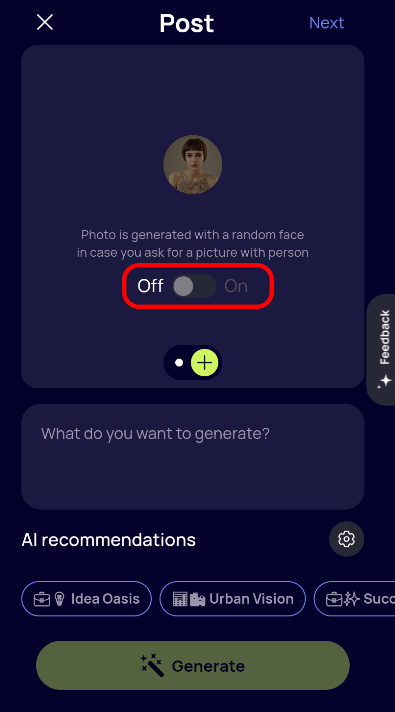
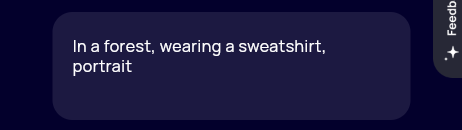
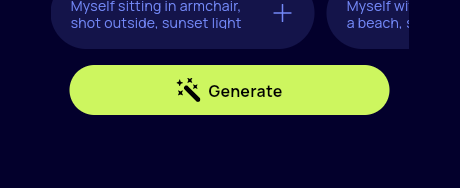
5. Type what you want to generate into the text box or choose an AI recommendation. Don't worry about prompt engineering - we handle this for you on our backend. But the best practice is to avoid words like "Generate me", "Please" etc. - just describe what you want to see on the picture
6. Then click "Generate"
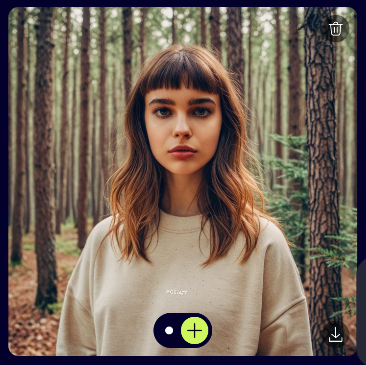
7. You've generated a picture! Now you can edit it, delete it, download it, add another one to your post, or proceed further with your post.
If you want to learn more about how to edit your photos with AI, check that article. In this article, we will proceed with our generation result by clicking "Next" in the upper right corner. 8. Now you can add a caption to your Instagram post. If you click "generate" while leaving it blank, Pygma will look at your picture and write an appropriate caption.If you type something and then click "generate", Pygma will make a caption based on what you've typed.You can also just type what you want to be in the caption yourself, edit the generation result, or just leave it blank.
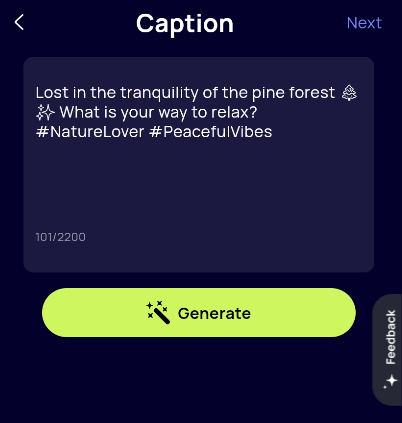
When you're satisfied with your caption, click "Next" in the upper right corner. 9. Now you can check what your post looks like. You can save it to your Pygma dashboard or schedule and publish it directly to Instagram if you've linked your Instagram to Pygma.
Here's how to connect your Instagram to Pygma for easy publishing
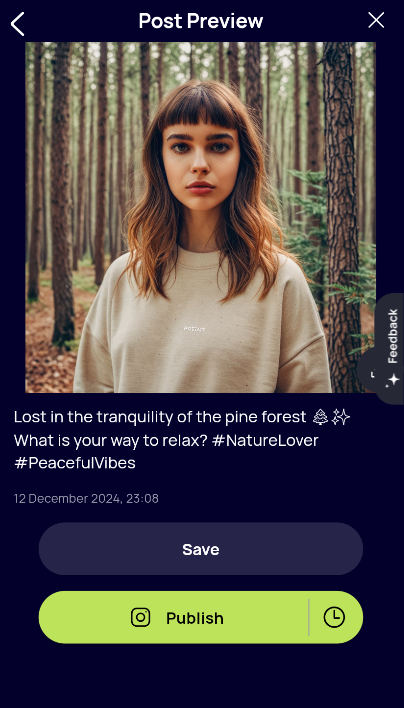
If you schedule your post, you can choose the time and date it should be posted. You can also post it immediately.
If you just save your post, you can always find it in your profile, where you can schedule its posting or download its content to post it manually
Now you know how to create realistic photos for your social media instantly! Good luck and happy creating.